Subscribe:

Ads 468x60px

Pages

Showing posts with label powerpoint2010. Show all posts

10/30/12

PowerPoint 2010 Basic Task

Here are some basic tasks that you can do to help you learn how to use Microsoft Office PowerPoint 2010.
 
In this article

What is PowerPoint?

PowerPoint 2010 is a visual and graphical application, primarily used for creating presentations. With PowerPoint, you can create, view, and present slide shows that combine text, shapes, pictures, graphs, animation, charts, videos, and much more.

Top of Page Top of Page

Find and apply a template

PowerPoint 2010 allows you to apply built-in templates, to apply your own custom templates, and to search from a variety of templates available  on Office.com. Office.com provides a wide selection of popular PowerPoint templates, including presentations and design slides.
To find a template in PowerPoint 2010, do the following:
  1. On the File tab, click New.
  2. Under Available Templates and Themes, do one of the following:
  • To reuse a template that you’ve recently used, click Recent Templates, click the template that you want, and then click Create.
  • To use a template that you already have installed, click My Templates, select the template that you want, and then click OK.
  • To use one of the built-in templates installed with PowerPoint, click Sample Templates, click the template that you want, and then click Create.
  • To find a template on Office.com, under Office.com Templates, click a template category, select the template that you want, and then click Download to download the template from Office.com to your computer

Template lists in the PowerPoint Backstage view
 Note    You can also search for templates on Office.com from within PowerPoint. In the Search Office.com for templates box, type one or more search terms, and then click the arrow button to search.

Top of Page Top of Page

Create a presentation

  1. Click the File tab, and then click New.
  2. Do one of the following:
  • Click Blank Presentation, and then click Create.
  • Apply a template or theme, either from those built-in with PowerPoint 2010, or downloaded from Office.com. 
Top of Page Top of Page

Open a presentation

  1. Click the File tab, and then click Open.
  2. In the left pane of the Open dialog box, click the drive or folder that contains the presentation that you want.
  3. In the right pane of the Open dialog box, open the folder that contains the presentation.
  4. Click the presentation, and then click Open.
 Note   By default, PowerPoint 2010 shows only PowerPoint presentations in the Open dialog box. To view other kinds of files, click All PowerPoint Presentations, and select the type of file that you want to view.
Open a PowerPoint 2010 file.
Top of Page Top of Page

Save a presentation

  1. Click the File tab, and then click Save As.
  2. In the File name box, type a name for your PowerPoint presentation, and then click Save.
 Note   By default, PowerPoint 2010 saves files in the PowerPoint Presentation (.pptx) file format. To save your presentation in a format other than .pptx, click the Save as type list, and then select the file format that you want.
Save as a file in PowerPoint 2010.

Top of Page Top of Page

Insert a new slide

To insert a new slide into your presentation, do the following:
  • On the Home tab, in the Slides group, click the arrow below New Slide, and then click the slide layout that you want.
The Home tab, in PowerPoint 2010, looking at the Slides group.

Top of Page Top of Page

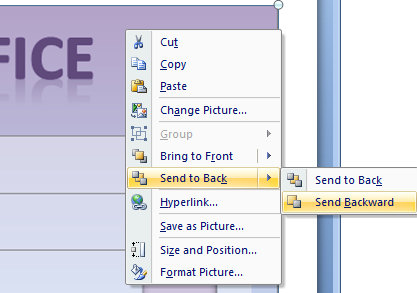
Add shapes to the slide

  1. On the Home tab, in the Drawing group, click Shapes.
The Home tab, in PowerPoint 2010, looking at the Drawing group.
  1. Click the shape that you want, click anywhere on the slide, and then drag to place the shape.
To create a perfect square or circle (or constrain the dimensions of other shapes), press and hold SHIFT while you drag.

Top of Page Top of Page

View a slide show

To view your presentation in Slide Show view from the first slide, do the following:
  • On the Slide Show tab, in the Start Slide Show group, click From Beginning.
The Slide Show tab, in PowerPoint 2010, looking at the Start Slide Show group.
To view your presentation in Slide Show view from the current slide, do the following:
  • On the Slide Show tab, in the Start Slide Show group, click From Current Slide.
The Slide Show tab, in PowerPoint 2010, looking at the Start Slide Show group.

Top of Page Top of Page

Print a presentation

  1. Click the File tab, and then click Print.
  2. Under Print What, do one of the following:
  • To print all slides, click All.
  • To print only the slide that is currently displayed, click Current Slide.
  • To print specific slides by number, click Custom Range of Slides, and then enter a list of individual slides, a range, or both.
 Note   Use commas to separate the numbers, with no spaces. For example: 1,3,5-12.
  1. Under Other Settings, click the Color list, and select the setting that you want.
  2. When you finish making your selections, click Print.
The File tab in PowerPoint 2010, looking at Print.

Top of Page Top of Page

Tips for creating an effective presentation

Consider the following tips to create a compelling presentation that engages your audience.

Minimize the number of slides

To maintain a clear message and to keep your audience attentive and interested, keep the number of slides in your presentation to a minimum.

Choose an audience-friendly font size

Choosing the best font size helps communicate your message. Remember that the audience must be able to read your slides from a distance. Generally speaking, a font size smaller than 30 might be too difficult for the audience to see.

Keep your slide text simple

You want your audience to listen to you present your information, instead of reading the screen. Use bullets or short sentences, and try to keep each to one line; that is, without text wrapping.
Some projectors crop slides at the edges, so that long sentences might be cropped.

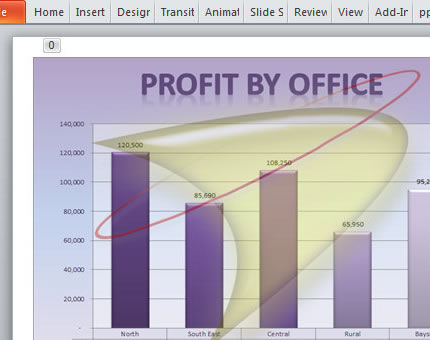
Use visuals to help express your message

Pictures, charts, graphs, and SmartArt graphics provide visual cues for your audience to remember. Add meaningful art to complement the text and messaging on your slides.
As with text, however, avoid including too many visual aids on your slide.

Make labels for charts and graphs understandable

Use only enough text to make label elements in a chart or graph comprehensible.

Apply subtle, consistent slide backgrounds

Choose an appealing, consistent template or theme that is not too eye-catching. You do not want the background or design to detract from your message.
However, you also want to provide a contrast between the background color and text color. The built-in themes in PowerPoint 2010 set the contrast between a light background with dark colored text or dark background with light colored text.

Check the spelling and grammar

To earn and maintain the respect of your audience, always check the spelling and grammar in your presentation.
Top of Page Top of Page

9/11/12

PowerPoint Animations - Getting Started

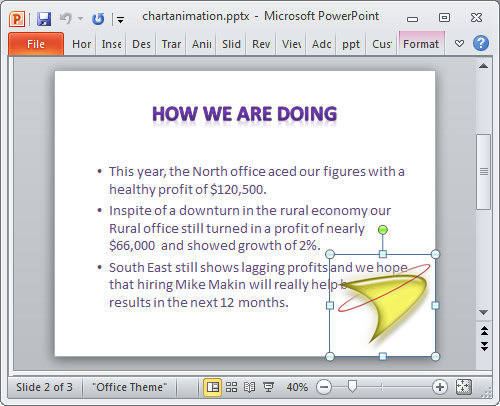
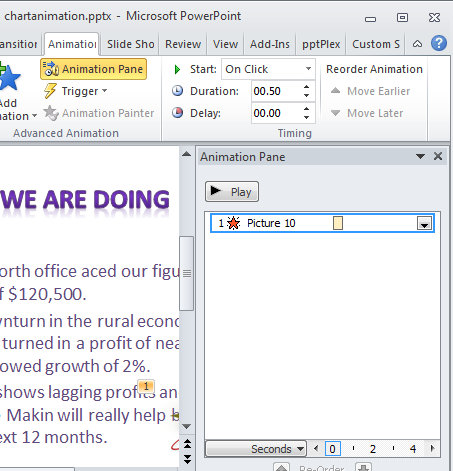
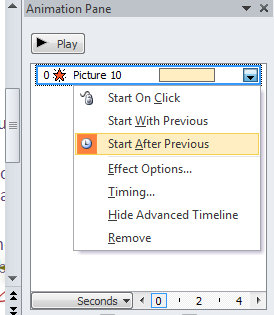
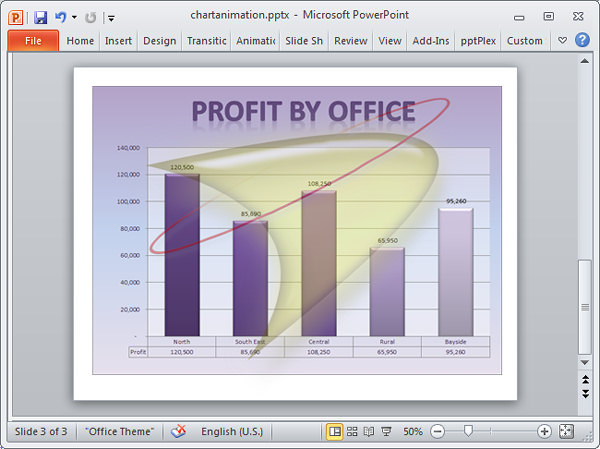
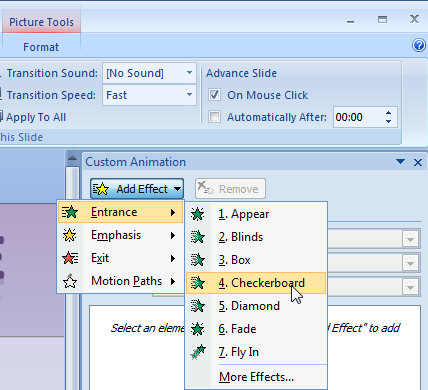
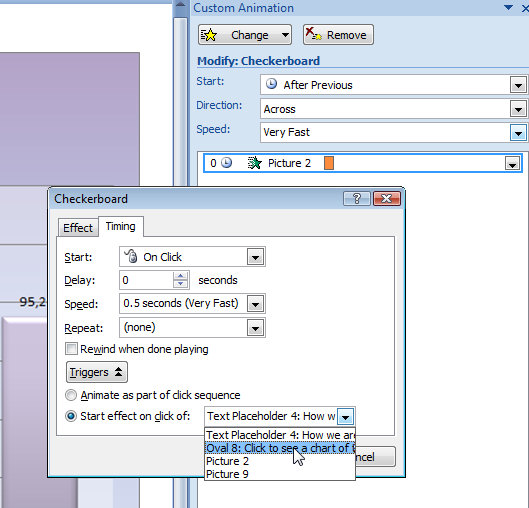
Here's how to create animations using the Microsoft PowerPoint custom animation pane...
The PowerPoint animations task pane lets you create a range of custom animations in PowerPoint.
In this article, I'll show you how to create some animation effects and how to layer objects so the animations look as they should.
Getting Started
To see how to add a simple animation to a logo on a slide, download these images which are called : swashlogo.png and swashlogo_transparent.png - you will need both for this tutorial. To download them, right click on each and choose Save Image As.


Once you have created the animation it will display this logo on a slide and it will then disappear within a few seconds of the slide being shown. This is a handy way to badge your slides with your company logo without visibly overshadowing the slide content.

A simple animation
Start by adding the image swashlogo.png to your slide by choosing Insert tab > Insert Picture and size and position it in the bottom right corner of your slide.


Click on the image and choose Animations tab and, from the Animate dropdown list choose Animation Pane to display the Animation taskpane.

To have this image disappear after a few seconds, from the Animation panel's Exit options, choose Fade. If Fade isn’t in the list, choose More Exit Effects and locate the Fade effect in the effect collection. Right click the entry in the custom animation pane and choose Show Advanced Timeline. This shows an orange bar indicating how long the animation will play for.


You can drag the animation end point to change where the animation finishes. Right click it and choose Start After Previous to ensure that it begins when the slide first appears. Click the Slideshow button to preview the slideshow and watch the animation play. The logo will disappear within a few seconds of the slide appearing.


More complex animation
To make a larger version of the logo appear over the entire slide, select the slide to work with and choose Insert tab > Insert Picture and this time choose swashlogo_transparent.png. Size the image to fit the slide. This is an almost transparent version of the logo through which you can see underlying objects on the slide.


To animate it so it appears a few seconds after the slide appears, select the image and from the Custom Animation task pane choose Add Effect > Entrance and choose Fade. Right click the object in the task pane and choose Start After Previous. Click the Slideshow button to preview the effect.
To ensure that the logo appears on top of other objects on the slide, select it, right click and choose Bring To Front > Bring Forward. The ordering of objects on the slide affects not only their visibility but also if they are clickable – an object hidden under another cannot be clicked.
Click a shape to run an animation

Add an image to the slide. This image will display when a shape is clicked. Position the image and to layer it behind another image on the slide, such as the swashlogo, right click it and choose Send to Back > Send Backwards.


Add a shape to the slide and type some text into it. Select the image – if this is difficult, choose Home tab > Select > Selection Pane and click on the image to select. In the custom animation screen, choose Add Effect > Entrance and then choose an entrance effect such as checkerboard.


Set the Start to After Previous. Right click the animation entry and choose Timing. Click Triggers to display the trigger options and choose Start Effect on Click of and then choose the shape as the trigger and click Ok. When you play the slide and click the shape the image will appear.


3/11/12

10 Quick Access and Shortcut to Powepoint 2010

  1. Open Powerpoint fast
     • Press Windows Key+R, type winword then press enter

  2. Use office.com template
    • On the file tab, click New, and the under office.com templates choose template

  3. Make a slide from a bullet
    • On the left above the slide thumbnaiks, click the outline tab
    • Select the text you want on its own slide
    • Press Shift + Tab

  4. Crop a picture to shape
    • Select the pictures that you want to crop to a specific shape
    • Under the picture tools on the format tab, in the Size group, click the arrow under crop
    • Click crop to shape an then click the shape you want to crop to

  5. Zoom with your mouse
    • If your mouse has a wheel, hold down the ctrl key, and then rotate the wheel forward to zoom in. Rotate the wheel backward to room out

  6. Reuse slide from another presentation
    • Open the presentation that you want to add a slide to
    • In the Pane that contain the outline and the slide tabs, clcik slide and click where you want to add a slide.
    • On the Home tab, in the slide group, click the arrow below new slide, and then select Reuse slide
    • In the reuse slide pane, click open a Powerpoint file
    • In the browse dialogue box, locate and click presentation file that contain the slide that you want, and then click open.
    Tips in this Reuse slide pane; Powerpoint display thumbnails of the slides from presentation file that you selected. Rest the ponter on the thumbnails to see a larger version of the slide’s content
    In the Reuse Slide pane, do one of the following;
    • To add a single slide, click the slide
    • To add all of the slides, right click any slides, and then select Insert All slides
    Note:
    If you want the slide that you are adding to the destination presentations to maintain the formatting of the original presentation, select the Keep source formatting check box before you add the slide to the destination presentation.
    • To add a single slide, click the slide
    • To add all of the slides, right click any slides, and then select Insert All slides on the shortcut menu

  7. Slide Sorter view
    • In the lower-right corner of the screen, press the slide Shorter button.

  8. Insert a screenshot or screen clipping
    1. Click the slide you want to add the screen shot to.
    2. On the Insert tab, in the Images group, click Screenshot
    3. Do one of the following;
        • To add the whole window, click the thumbnails in the Available Windows gallery.
        • Click Screen Clipping, and when the pointer becomes a cross, press an hold the left mouse button to select the area of the screen that you want to capture.

  9. Show the Hidden Button
    • Press Ctrl + F1

  10. Use the Quick Access Toolbar
    • Right click a button, and then click add to Quick Access Toolbar

1/13/12

Backstage View


Backstage view gives you various options for saving, opening a file, printing, or sharing your document. It is similar to the Office Button Menu from PowerPoint 2007 or the File Menu from earlier versions of PowerPoint. However, instead of just a menu, it is a full-page view which makes it easier to work with.

To Get to Backstage View:

  1. Click the File tab.

Backstage View
  1. You can choose an option on the left side of the page.
  2. To get back to your document, just click any tab on the Ribbon.


Intoduction
Start Working with Powerpoint
To Costumize Ribbon
Minimize and maximize Toolbar 
Quick Access Toolbar

The Quick Access Toolbar


The Quick Access Toolbar is located above the Ribbon, and it lets you access common commands no matter which tab you are on. By default, it shows the Save, Undo, and Repeat commands. You can add other commands to make it more convenient for you.

To Add Commands to the Quick Access Toolbar:

  1. Click the drop-down arrow to the right of the Quick Access Toolbar.
  2. Select the command you wish to add from the drop-down menu. To choose from more commands, select More Commands
 Adding a command to the Quick Access toolbar

Intoduction
To Costumize Ribbon
Start Working with Powerpoint
Minimize and Maximize Ribbon
Backstage View

To Minimize and Maximize the Ribbon:


The Ribbon is designed to be responsive to your current task and easy to use, but if you find it is taking up too much of your screen space, you can minimize it.
  1. Click the arrow in the upper-right corner of the Ribbon to minimize it.

Minimize the Ribbon button
  1. To maximize the Ribbon, click the arrow again.

When the Ribbon is minimized, you can make it reappear by clicking on a tab. However, the Ribbon will disappear again when you are not using it.

To Customize the Ribbon:


You can customize the Ribbon by creating your own tabs that house your desired commands. Commands are always housed within a group, and you can create as many groups as you need to keep your tabs organized. In addition, you can even add commands to any of the default tabs, as long as you create a custom group within the tab.
  • Right-click the Ribbon and select Customize the Ribbon. A dialog box will appear.


Right-clicking the Ribbon to customize it
  • Click New Tab. A new tab will be created with a new group inside it.
  • Make sure the new group is selected.
  • Select a command from the list on the left, then click Add. You can also drag commands directly into a group.
  • When you are done adding commands, click OK.
  Customize Ribbon Dialog Box

If you do not see the command you want, click on the Choose commands drop-down box and select All Commands.
Displaying All Commands


Working with Your PowerPoint 2010


The 'Ribbon' and the 'Quick Access Toolbar' are where you will find the commands you need to do common tasks in PowerPoint. If you are familiar with PowerPoint 2007, you will find that the main difference in the PowerPoint 2010 Ribbon is that commands such as Open and Print are now housed in 'Backstage view'.

The Ribbon

The Ribbon contains multiple tabs, each with several groups of commands. Some tabs, like "Drawing Tools" or "Table Tools," may appear only when you are working with certain items like images or tables. In addition, you can add your own customized tabs that contain your favorite commands. 


PowerPoint Ribbon

Certain programs, such as Adobe Acrobat Reader, may install additional tabs to the Ribbon. These tabs are called Add-ins.

Intoduction
To Costumize Ribbon
Minimize and maximize Toolbar 
Quick Access Toolbar
Backstage View

Introduction


PowerPoint 2010 is a presentation software that allows you to create dynamic slide presentations that may include animation, narration, images, videos and more. In this lesson, you will learn your way around the PowerPoint 2010 environment, including getting to know the new Backstage view.
We will also show you how to use and modify the Ribbon and the Quick Access Toolbar, in addition to learning how to create new presentations and open existing files. After this lesson, you will be ready to get started on your first presentation.

Getting to Know PowerPoint 2010

If you are familiar with PowerPoint 2007, then you will notice that there are not too many changes to the 2010 interface, other than the Backstage View, which we will cover later in this lesson.  
However, if you are new to PowerPoint, you will first need to take some time to learn about slides and how to navigate through PowerPoint.

How to Navigate PowerPoint to Create a Slide Presentation

PowerPoint uses slides to build a presentation. In order to create an engaging presentation, PowerPoint allows you to add text, bulleted lists, images, charts, video and more to your slides. You can add as many slides as you like to a presentation and at any time you can view or playback your presentation by selecting one of the Slide Show play options. 


Start Working with Powerpoint
To Costumize Ribbon
Minimize and maximize Toolbar 
Quick Access Toolbar
Backstage View